
‘Hammer It Home’ To Hit The Ball Long and Straight
By CHRIS JOHNSTON, PGA PROFESSIONAL | FL Golf Schools Central Florida Director
PHOTOS BY DALE SHANKLAND
When most amateurs decide to play this game, they simply grab the golf club without any idea where their hands should be placed. From that point on, faults begin to affect their golf swing. There are countless variations of the “bad” golf grip that the beginner comes up with and an equal number of swing faults that happen because of it.
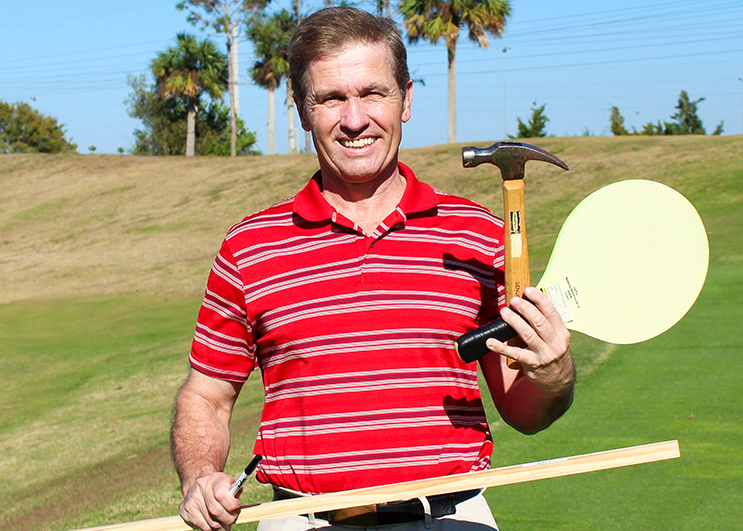
GOLF GRIP TRAINING TOOLS (See Photo Above)
- Paddle
- Hammer
- 3/4” Square Molding
- Black Erasable Marker
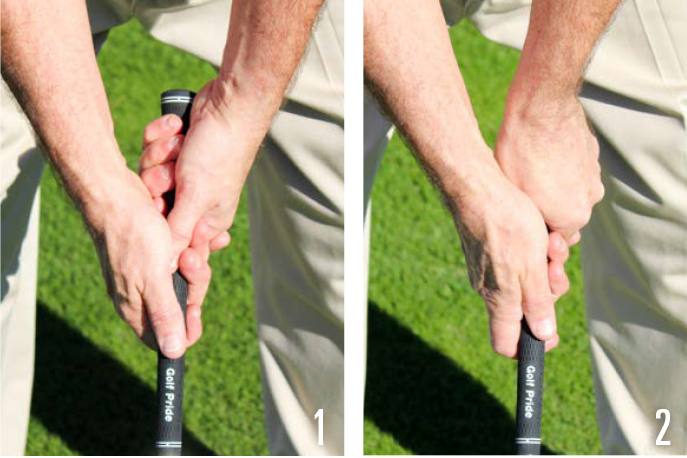
The most common is the “Under” grip. The Under grip, as show in Photo 1, has the hands off to the side and under the han-dle — the handle in the palms of the hands. A good grip will have both hands more on top of the handle with the handle more in the fingers, as in Photo 2. The Under grip will bury you with shots that are dead and out of play, while a good grip will keep you in the land of the living and in play.
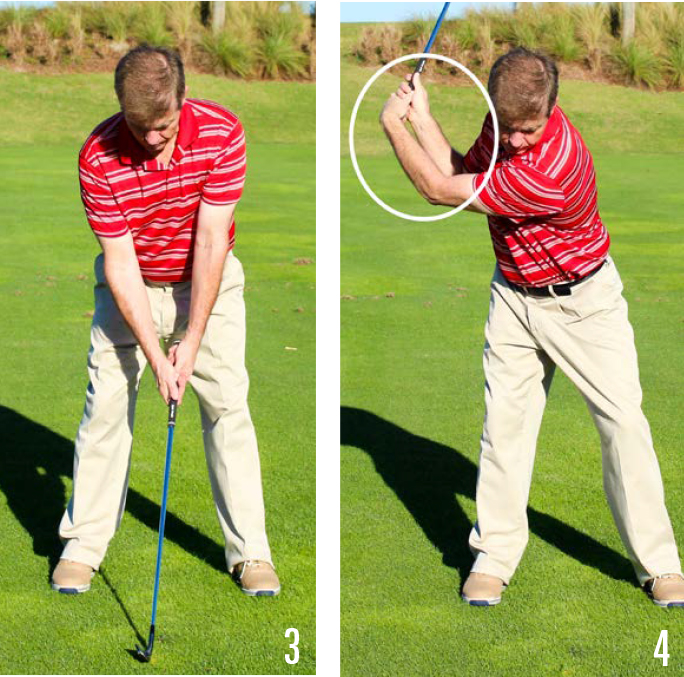
Although there are a host of swing faults that occur with a bad grip (Photo 3) the most common is the “bow and bend.” With the Under grip the wrists are not in position to hinge freely in the backswing. Because of this, there is a bowing of the top hand, followed by the bending of the lead arm with limited wrist hinge (Photo 4). This can cause the golfer to top shots, make contact off the toe of the club and even miss the ball.
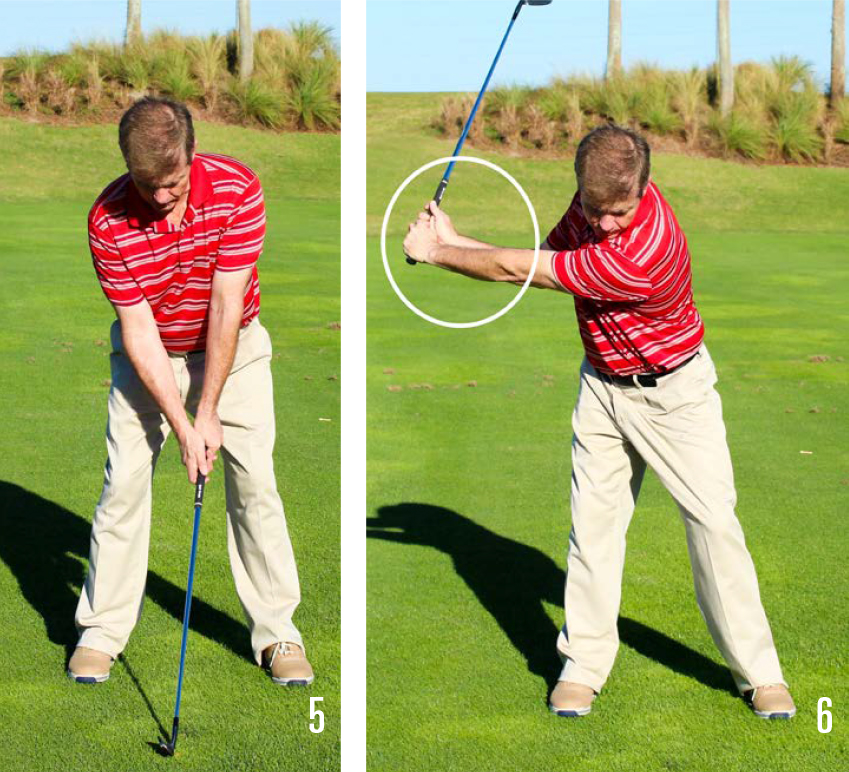
Now, a good grip, as in Photo 5, results in the wrists being in position to hinge freely in the backswing. This gives the golfer a chance to hinge their wrists without the bowing of the top hand and in turn the lead arm has a chance to remain straight in the backswing, as in Photo 6. When this happens, the golfer hits the ball more consistently, with center face hits, resulting in shots hit longer and straighter.
SIMPLE PHILOSOPHY: Top Hand = Leverage and Bottom Hand = Square
GOLF GRIP ‘HAMMER’ HAND
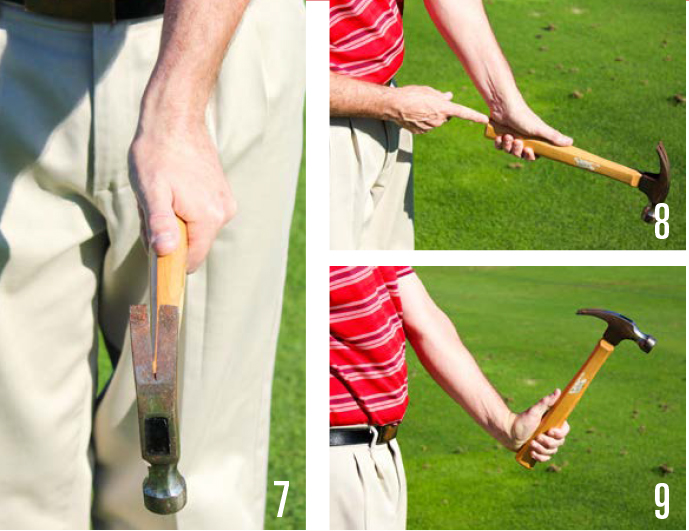
As important as the position itself, understanding the role of the top hand is key to proper placement. You want to take the top hand and place it where the wrist is centered over top of the handle for the feel of leverage and support, just like you would hold a hammer (Photo 7). This will put the bottom of the wrist on top of the handle (Photo 8), giving you the ability to hinge your wrist while keeping the hammer head in control (Photo 9). As a training exercise, take a hammer and place it in your top hand and practice acquiring this feel. Note: Only modification is your thumb will be on top of the handle, slightly off to the side.
GOLF GRIP ‘PADDLE’ HAND
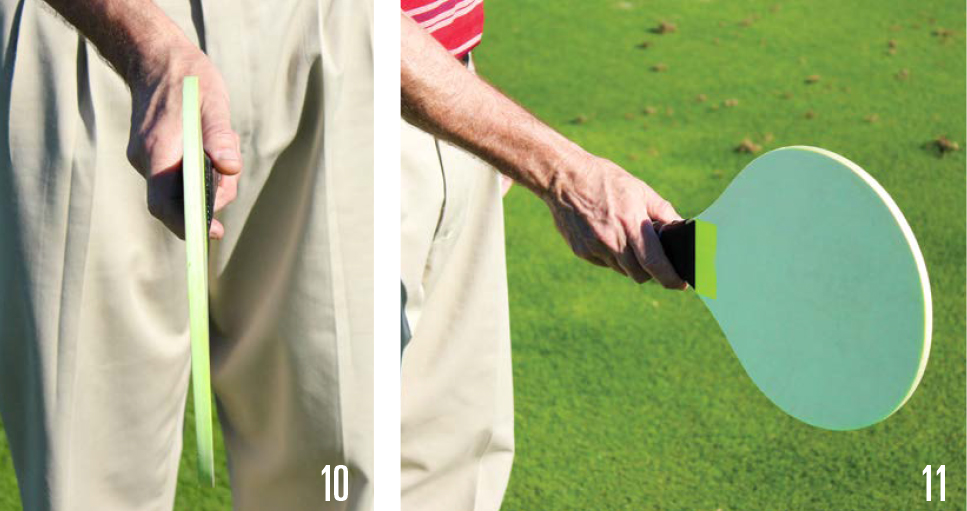
The bottom hand’s position is square to the clubface, just like you would position the hand if you were holding a paddle or a racket, as in Photos 10-11. This will help you know where the clubface is in the golf swing and help you return the club back to square at impact, while promoting a proper release through impact. As a training exercise, take a paddle or racket and practice this feel.
GOLF GRIP STICK TRAINING TOOL
IN LINE’ and ‘SQUARE’
The GRIP STICK training tool will help you get your grip IN LINE and SQUARE. I also suggest you work on your grip 5 to 10 minutes a day for at least a week, as the great Ben Hogan once recommended.
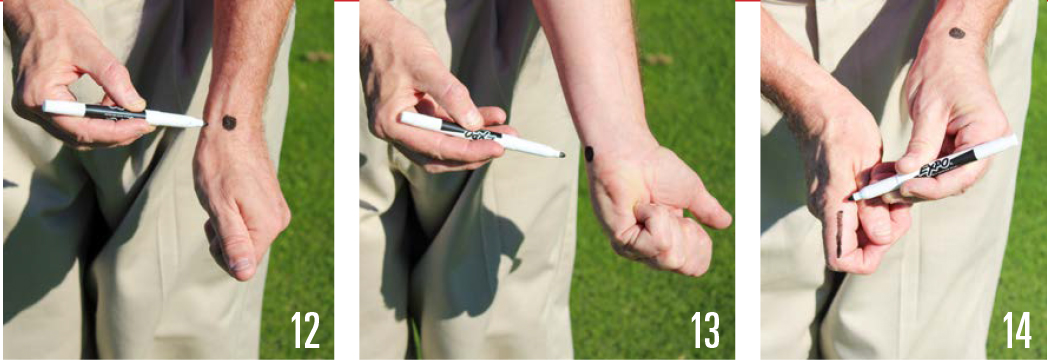
TOP HAND: Take a black erasable marker and make a spot on the top of the wrist, Photo 12, followed by a spot on the bottom, Photo 13.
BOTTOM HAND: Make a black line from the middle knuckle to the top knuckle, Photo 14.

GOLF GRIP STICK — TOP
Take the 3/4 inch square molding stick and place a spot one inch from the end (Photo 15), followed up by a line and arrow one inch down from the spot (Photo 16).
GOLF GRIP STICK — BOTTOM
Make a black six-inch straight line ending about six inches from the arrow (Photo 17).

BUILD YOUR GOLF GRIP
Hold the very end of the Grip Stick with the thumb on top, just up from the spot, while the other end is on the ground (Photo 18). Then take the top hand and position the wrist with all three spots lined up (Photo 19).

‘IN LINE’ FOR LEVERAGE
Lining up the wrist means connecting all three dots. Photo 20 is an important photo for understanding the placement of the top hand. Photo 21 helps to illustrate how the wrist lines up over the handle, while Photo 22 shows how it’s off to the side and under.
SQUARE = PARALLEL
When you fit the lifeline over the thumb, your focus will be on squaring up the finger line parallel with the centerline on the Grip Stick. This centerline represents the line that would be in line with the clubface, if there were a club on the end of the stick.
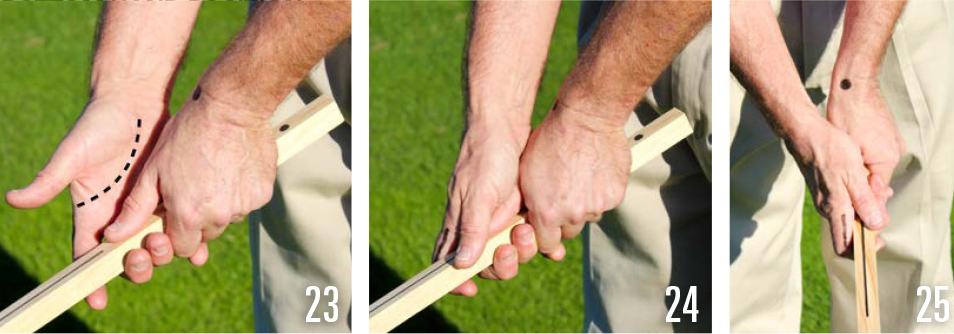
Order of Play: The process when positioning the bottom hand is simply; Pinky, Fingers, Fold (Photos 23-24).
Once you have positioned your bottom hand, turn your focus to grip pressure. The hand should feel like it is “light” in pressure. In order for the wrists to work effectively during the swing, your bottom hand must be light, not tight. (Photo 25)
Priority: Get it right then make it light.

BUILD YOUR GOLF GRIP ON THE CLUB
Training with the Grip Stick is important for acquiring feel and understanding of the placement of both hands, but equal amounts of work is necessary for transferring feel to the golf club. The only modification that needs to be done is a placement of a black spot on the thumbnail of the top hand (Photo 26).
TOP HAND
Start your grip routine by holding the very end of the club (Photo 26).
NOTE: Make sure the clubface is square. Follow this by placing the top hand in position by lining up the spots. Use the thumb nail spot as your third spot in place of the spot that was on your Grip Stick, Photo 27.
BOTTOM HAND
Now raise the club and focus on the feel of support and leverage in the top hand (Photo 28), while placing your bottom hand square to the clubface (Photos 29 and 30).